ByteChef Embedded, Part 1: Let Your Users Connect Their Apps
On this page
TL;DR: Before a customer can automate anything in your product, they have to connect their own accounts. ByteChef Embedded makes that a two-piece job: (1) your backend signs a JWT identifying one of your users as a ByteChef connected user, and (2) your frontend calls one hook -
useConnectDialogfrom@bytechef/embedded- which mounts a hosted ConnectDialog that runs the whole OAuth/API-key handshake, stores and refreshes the credentials, and doubles as the manage surface once a connection exists. This is part one of a hands-on series that walks the embedded sample app feature by feature. We start where every embedded integration starts: connecting an app.
If you're embedding automation inside your own SaaS product, the very first wall you hit isn't workflows - it's connections. Before your customer can "sync new leads to their CRM," they have to connect their CRM, with their OAuth grant, stored securely, refreshed forever. Do that yourself and you've signed up to build and maintain OAuth for Salesforce, and HubSpot, and Slack, and the next hundred apps your customers ask for. That's not a feature; it's a department.
ByteChef Embedded exists to delete that work, and this series shows exactly how - using the real embedded sample app (a Next.js frontend + a small Node backend) as our guide. Over the coming parts we'll build out each way your users can create automations. But all of it rests on this first step, so that's where we begin: letting your users connect their apps.
The Auth Model: Connected Users, Not ByteChef Accounts
Here's the crucial idea that makes embedded work: your end users never get a ByteChef account. They're your users. ByteChef knows them only as connected users, identified by a token your backend signs.
The sample app's backend does exactly this - one endpoint that mints a JWT:
const payload = {
  sub: externalUserId,          // your app's user id
  name: name || externalUserId,
  iat: Math.floor(Date.now() / 1000),
};

const token = jwt.sign(payload, BYTECHEF_PRIVATE_KEY, {
  algorithm: 'RS256',
  expiresIn: TOKEN_EXPIRY,
  keyid: BYTECHEF_KID,
});
You hold the private key; ByteChef verifies with the matching public key. The sub claim is your user id (externalUserId) - so a token says, in effect, "this is my user #1234, acting as themselves." Your frontend fetches that token from your backend and never touches the key:
const token = await getToken(); // POSTs to your /api/tokenThat's the entire identity story. Every embedded call the frontend makes carries this JWT (plus an X-ENVIRONMENT header), and ByteChef scopes everything - connections, workflows, executions - to that connected user.
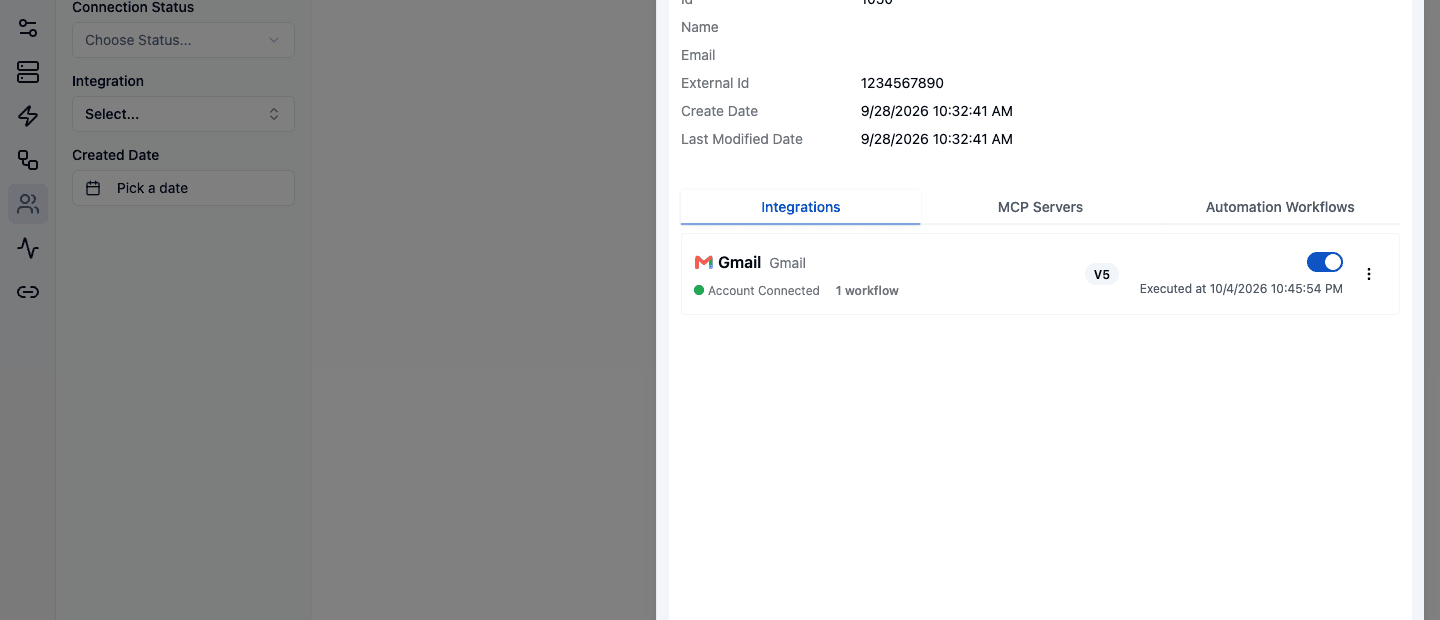
You can see those users from the ByteChef side. Embedded → Connected Users lists everyone your backend has signed a token for, with the sub claim as their External Id and an icon for each integration they've connected. Click one to open their sheet: profile, the integrations they've connected, the MCP servers they can reach, and their automation workflows.
Listing the Integrations You Offer
Your users can only connect what you've published. In ByteChef, an integration wraps one component (Gmail, Affinity, Infobip) plus any workflows you want to ship with it. Create them under Embedded → Integrations and click Publish. Only published versions are visible to connected users, and the green PUBLISHED badge tells you which version they get.
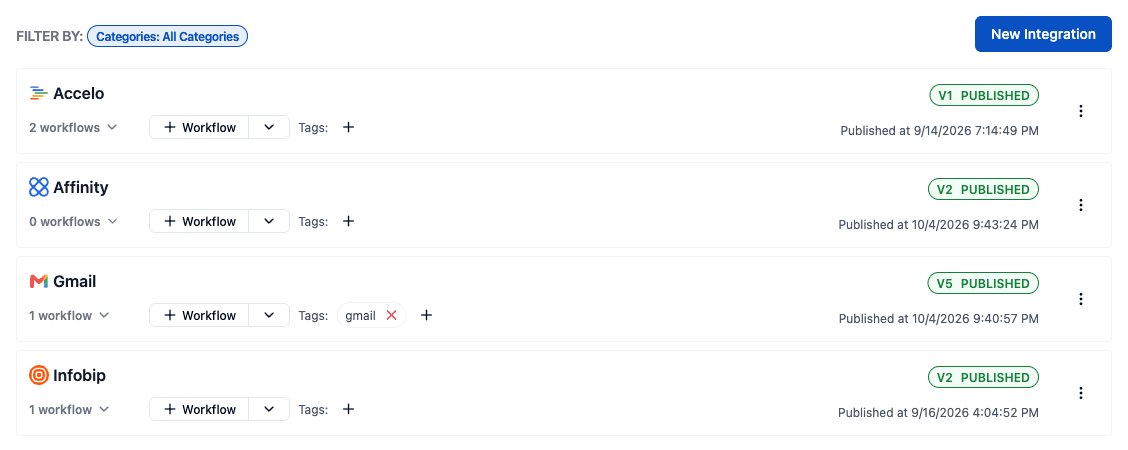
Publishing alone doesn't make an integration show up for users. Under Embedded → Integration Configurations, create an instance configuration for the published version and enable it. That's the switch that puts the integration in front of connected users in a given environment.
The sample app fetches that catalog straight from the embedded API with the bearer token:
const res = await fetch(`${BYTECHEF_APP_BASE_URL}/api/embedded/v1/integrations`, {
  headers: { Authorization: `Bearer ${token}`, 'X-ENVIRONMENT': BYTECHEF_ENVIRONMENT },
});
Back comes the list of integrations you've defined - title, icon, category, and whether this user already has an instance connected. Render them as a grid of cards, and you've got an "Integrations" page with zero bespoke per-app code. Here's the sample app's, with Gmail already connected for the demo user:

The Star of Part One: useConnectDialog
Now the actual connecting. It's one hook:
import { useConnectDialog } from '@bytechef/embedded';

const { openDialog, closeDialog } = useConnectDialog({
  baseUrl,
  environment,        // DEVELOPMENT | STAGING | PRODUCTION
  integrationId,      // which integration the user clicked
  jwtToken,           // the connected-user token
});

// ...
openDialog();         // mounts the hosted connect flow
Call openDialog() and ByteChef mounts its ConnectDialog into a portal in your page. From the user's side it's a clean, hosted modal: pick the account, get bounced through the provider's OAuth consent (or enter an API key), and land back connected. From your side, the authorize URL, the callback, the code exchange and the scope handling all run inside that portal - per provider - and the tokens that come back are stored encrypted against this connected user, in this environment, then refreshed for as long as the connection lives. You never see or hold a credential.
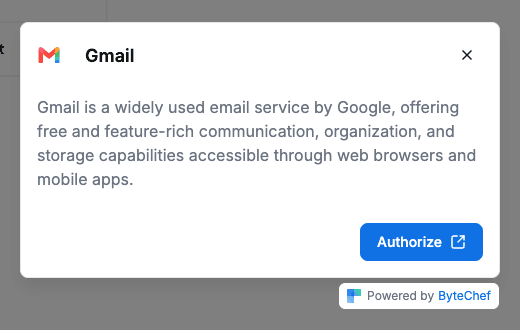
For an OAuth2 app like Gmail, the first screen is the integration's name, description, and a single Authorize button. Clicking it opens the provider's consent screen in a separate window (the icon on the button says as much), and the user approves access there, on Google's own page.
The dialog owns its own lifecycle, so its closing is something you observe rather than subscribe to: the hook hands back openDialog and closeDialog, and the sample app watches the #connect-dialog-portal node empty out to know when to refresh its list. That's it - that's a production-grade "Connect your Salesforce" button, for any of ByteChef's 280+ connectors, without you writing a single OAuth line.
After the Connect: the Same Dialog Manages It
A connection is not a one-time event. Users come back to change what is switched on, or to revoke it altogether, and that does not need a second UI: openDialog() already covers both cases.
When the dialog opens it looks for an existing instance, the one named by integrationInstanceId if you passed it, otherwise the first this connected user already has. Find one and it opens in manage mode instead of the auth flow:
const {openDialog} = useConnectDialog({
  baseUrl,
  environment,
  integrationId,
  jwtToken,
  integrationInstanceId,   // optional: manage one specific connection
});
From there the user can toggle which of your published workflows run for their account, edit the inputs a workflow asks them for, or disconnect. If the integration's component is also on an MCP server, the dialog adds a Tools tab next to Workflows, with a toggle for each AI tool (part six covers those).
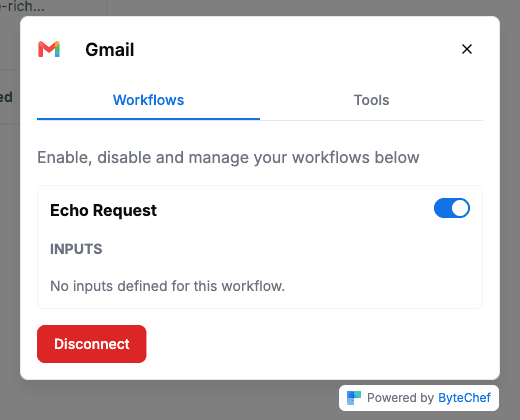
Everything inside the dialog, including the Powered by ByteChef footer, is rendered by ByteChef; the page around it is yours. Each is a call ByteChef makes against /api/embedded/v1/integration-instances/... on their behalf. Disconnecting deletes the instance and closes the dialog, so the next openDialog() starts the auth flow again.
That fallback to the first instance is why the sample app's integration card can stay so simple: it flips its label between "Connect" and "Connected" purely on whether integrationInstances is empty, and calls the same hook either way.
What You Didn't Build
Step back and total up what the ConnectDialog absorbed:
- Per-provider OAuth flows (×280), callbacks, scope handling.
- Encrypted credential storage, scoped per user and environment.
- Token refresh, forever.
- A manage-connection UI: toggle workflows, edit their inputs, disconnect.
- Environment separation (Development / Staging / Production) out of the box.
Your side of the contract was two small pieces: sign a JWT in your backend, call one hook in your frontend. That's the whole promise of embedded - the integration surface your customers see is yours; the integration machinery is ByteChef's.
What's Next in This Series
Connecting an app is the foundation. Everything else is about turning that connection into automation - and the sample app's Automations page offers five different front doors to do it, each of which gets its own part:
- New from Template - start from a pre-built workflow you've published.
- New from Embedded Workflow Builder - drop ByteChef's full visual builder into your app.
- New from Prompt - generate a workflow from a natural-language description.
- New from Chat - build one conversationally.
- New from Custom Workflow Builder - craft your own builder UI on ByteChef's APIs.
Connections also power things that aren't workflows at all: your app calling one action directly on a user's account (part two: the ComponentKit Playground), and an AI assistant that acts in your users' apps (part three: the ComponentKit Chat).
We'll take them one at a time. But every one of them assumes the user has already connected the apps their automation touches - which is exactly what you just shipped.
Running the Sample App Yourself
The sample app needs to know two things: where your ByteChef instance lives, and which Signing Key your backend signs with.
- Point the frontend at ByteChef. In
front-end/.env.local, setNEXT_PUBLIC_BYTECHEF_APP_BASE_URL. On ByteChef Cloud that'shttps://app.bytechef.io. On a self-hosted instance it's your own URL, and the defaulthttp://localhost:8080already matches a local install, so you can leave it unset. - Give the backend a Signing Key. In ByteChef, open Embedded → Settings → Signing Keys, click New Signing Key, and copy it into
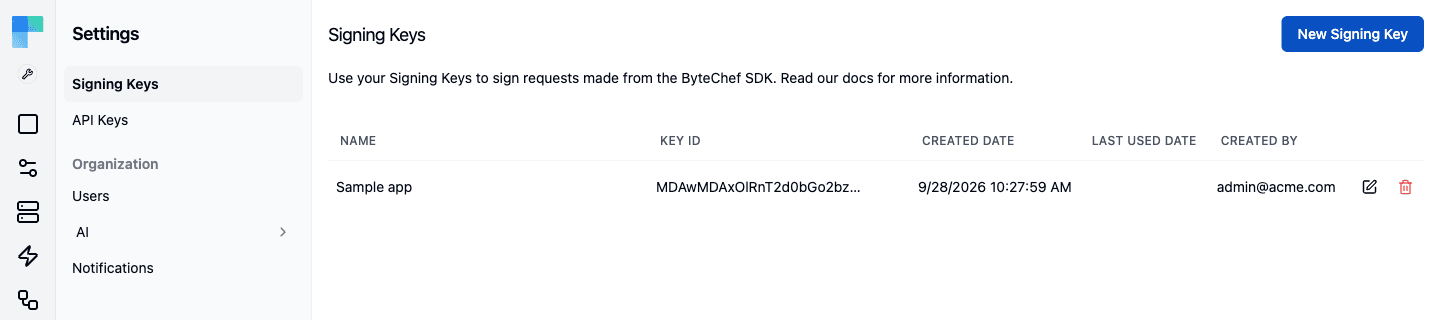
back-end/.envasBYTECHEF_PRIVATE_KEY(shown once) andBYTECHEF_KID. The Key ID column is thekidyour backend puts in the JWT header, so ByteChef knows which public key to verify with. Create it on the same instance the frontend points at - a Cloud key won't verify against a self-hosted server.
- Set the demo user.
NEXT_PUBLIC_BYTECHEF_EXTERNAL_USER_IDis thesubthe backend signs, and it's the External Id you'll see under Connected Users.
Everything else (environment, demo user id) has a working default. The sample app docs list every variable.
Want to follow along? Clone the embedded sample app, sign a JWT, and drop useConnectDialog into a page - your first "Connect" button is minutes away.
Subscribe to the ByteChef Newsletter
Get the latest guides on complex automation, AI agents, and visual workflow best practices delivered to your inbox.