20 min read
Ivica Čardić
TL;DR: The Integration Marketplace is the integrations page from part one, prebuilt:
<IntegrationMarketplace jwtToken={token} />from@bytechef/embedded0.4.0. Each connected user sees the integrations they're allowed to use and connects them with the same Connect dialog, which still opens in your page so your field-mapping callbacks keep working. On your side, you publish an integration and switch on an enabled configuration for it in each environment.
In part twelve you gave your users a complete automations page in one component: a template catalog, an activation wizard and a Connections tab. That covers the automations your users run. It doesn't cover the other half of an embedded product, the integrations you ship: the Salesforce sync or the Gmail digest you built once and offer to every customer.
For that half you already have a page. In part one your frontend fetched GET /api/embedded/v1/integrations with the connected user's JWT, rendered a card per integration labeled "Connect" or "Connected" depending on whether integrationInstances was empty, opened useConnectDialog from the card, and watched the #connect-dialog-portal node empty out to know when to refresh. It works, but now you own it: loading, empty and error states, icons, refresh, styling and every bug in between.
Nearly every vendor who embeds ByteChef builds that same page, so we ship it. The Integration Marketplace is that catalog as one component, and it keeps what made part one's approach powerful: the Connect dialog still runs in your page, with your callbacks. Here's how to set it up, what the component accepts, what your users get, and which API calls it makes.
You now have three ways to put integrations and automations in front of a connected user. They overlap less than it looks:
| Hand-built grid (part one) | Integration Marketplace (this part) | Automation Hub (part twelve) | |
|---|---|---|---|
| Lists | Integrations you shipped | Integrations you shipped | Automation templates you published |
| A user ends up with | An integration instance | An integration instance | A running automation in their own project |
| Rendering | Your React code | An iframe from your ByteChef host | An iframe from your ByteChef host |
| Connect flow | useConnectDialog, called by you | useConnectDialog, called by the component in your page | Inside the hub |
| Code you write | A data fetch, a grid, states, refresh logic | One component and a JWT | One component and a JWT |
On the server, the marketplace and the hand-built grid produce the same thing: an integration instance tying the connected user's connection to one of your integration's configurations. Only who draws the page differs.
An empty marketplace is almost always a setup issue. Four things must be true before a card appears.
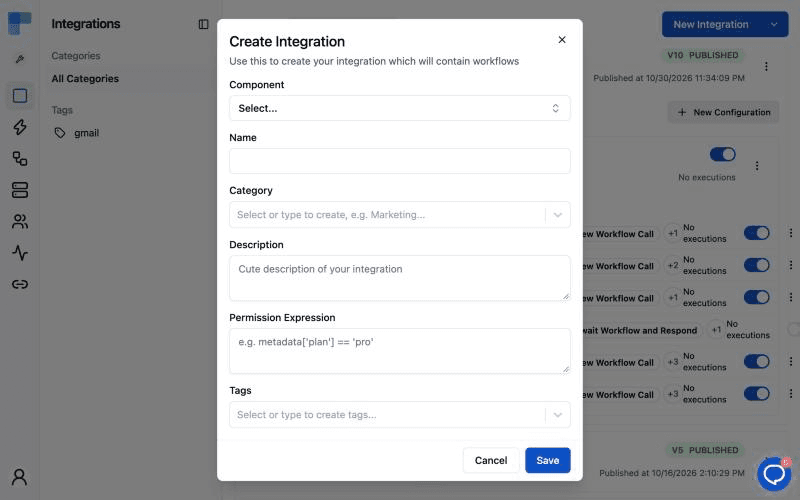
Integrations are authored in the Development environment. Pick it in the environment selector in the left sidebar, open Embedded → Integrations and click New Integration. The Create Integration dialog asks for a Component (the app this integration wraps, such as Gmail, Salesforce or Slack, which can't be changed later) and a Name, prefilled with the component's title. Category, Description and Tags are optional, and so is the Permission Expression, which we'll get to in step 3.
Add at least one workflow, then publish from the row's ⋮ menu (Publish stays disabled until there's a workflow) or with the Publish button in the workflow editor's header. Publishing freezes the current workflows as a numbered, read-only version, and connected users only ever run published versions.
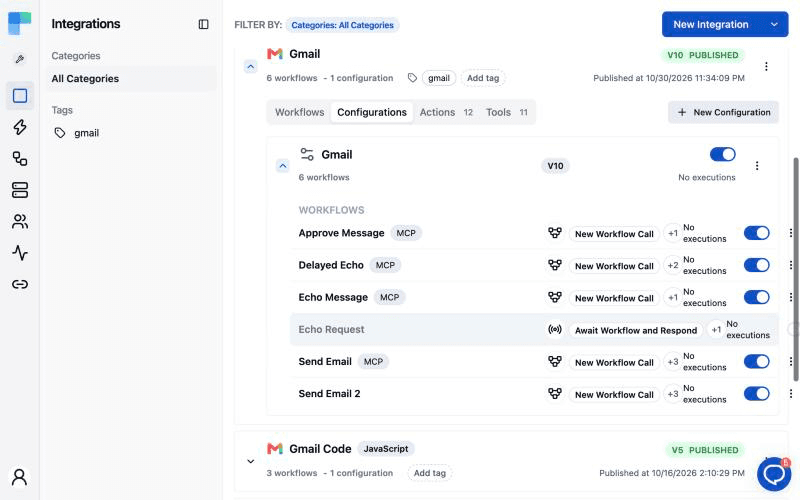
Publishing alone doesn't list an integration; a configuration does. It deploys one published version into one environment, with your OAuth app credentials, the workflows you switch on and their default inputs.
In Development there's no Integration Configurations sidebar entry. Expand the integration on Embedded → Integrations, open its Configurations tab and click Configure (or New Configuration once one exists). The ⋮ menu's New Configuration item and the editor's Configure button open the same wizard, and until the integration is published all of them are disabled with "Publish the integration before configuring it." In Staging and Production, the Integrations entry gives way to Embedded → Integration Configurations: click New Configuration and pick the integration in the Integration combobox.
The wizard has up to three steps. Basic takes the Integration, a Name, the published Version to deploy, an optional Assignment rule and, outside Development, Tags. OAuth2 Connection appears only for components that authenticate with OAuth2 and holds your OAuth app's client credentials. Workflows lets you switch each workflow on and set its inputs. Click Save.
Then comes the step people miss: flip the Enabled switch on the configuration's row. New configurations start disabled, and only enabled ones count. Each environment has its own list, so the DEVELOPMENT marketplace shows integrations with an enabled configuration in Development, and the PRODUCTION marketplace those with one in Production.
Two expressions decide whether a given user sees a given integration. Both are evaluated against the same context, built from the connected user: metadata, externalId, email, name and environment.
The integration's Permission Expression gates the integration itself. Blank means everyone; anything that doesn't evaluate to true, including a typo or an evaluation error, hides it. The configuration's Assignment rule decides which configuration a self-serve user lands on. The marketplace lists an integration only when at least one of its enabled configurations lets the user in, and on connect ByteChef picks the highest version among those (the newest one on a tie). A typical rule:
metadata['plan'] == 'pro' || metadata['plan'] == 'enterprise'metadata is whatever your backend attaches to the connected user, for example with PATCH /api/embedded/v1/me and the user's JWT. Values are stored as strings, so compare against quoted literals.
One exception: if a user already has an instance on an enabled configuration (say an admin provisioned it), the integration stays in their catalog even when no assignment rule would let them self-serve it. The integration's permission expression still applies. Expressions can also hide individual workflows inside an integration; that gets its own part later in the series.
The marketplace is one of three pages ByteChef lets other sites frame, with the Automation Hub and the workflow builder. In production, tell the server which origins your app runs on:
BYTECHEF_EMBEDDED_ALLOWED_PARENT_ORIGINS=https://app.example.com,https://admin.example.comThat's the bytechef.embedded.allowed-parent-origins property. ByteChef sends the list as Content-Security-Policy: frame-ancestors ... on integration-marketplace.html, so no other site can frame it, and the page only accepts its init message from those origins. Trailing slashes are stripped; scheme, host and port must match exactly. With the list empty, any site can embed the page, and the browser console says so.
The code is short. Here's the sample app's marketplace page, front-end/src/app/integration-marketplace/page.tsx, with the field-mapping callbacks trimmed (they get their own section below):
'use client';

import {IntegrationMarketplace} from '@bytechef/embedded';
import {getToken} from '@/lib/api';
import {BYTECHEF_APP_BASE_URL, BYTECHEF_ENVIRONMENT} from '@/lib/config';
import {useEffect, useState} from 'react';

export default function IntegrationMarketplacePage() {
    const [jwtToken, setJwtToken] = useState<string | null>(null);

    useEffect(() => {
        getToken().then(setJwtToken);
    }, []);

    if (!jwtToken) {
        return <div className="w-full p-4">Loading...</div>;
    }

    return (
        <div className="absolute inset-0 flex flex-col bg-muted lg:pl-72">
            <header className="px-4 pt-4">
                <h1 className="text-xl font-semibold">Integration Marketplace</h1>
            </header>

            <IntegrationMarketplace
                baseUrl={BYTECHEF_APP_BASE_URL}
                className="min-h-0 flex-1"
                environment={BYTECHEF_ENVIRONMENT}
                jwtToken={jwtToken}
                mapObjectFields={mapObjectFields}
            />

        </div>
    );
}
getToken() is part one's helper: it asks the sample's backend to sign a connected-user JWT and caches it until shortly before expiry. The page waits for the token because jwtToken is the one prop the component can't do without.
The props, all from sdks/frontend/embedded/library/src/components/integration-marketplace:
| Prop | Type | Default | What it does |
|---|---|---|---|
jwtToken | string | (required) | The connected user's JWT from part one. |
baseUrl | string | https://app.bytechef.io | Your ByteChef host. The iframe loads from here and the Connect dialog calls its API. |
environment | 'DEVELOPMENT' | 'STAGING' | 'PRODUCTION' | 'PRODUCTION' | Whose configurations count. Sent as X-Environment. |
className | string | none | Class for the wrapping div. The iframe fills it at 100% width and height, so give it a height. |
theme | object | none | Colors, font, radius and light or dark mode. See Theming. |
mapObjectFields | MapObjectFieldsType | none | Field-mapping callbacks handed to the Connect dialog. |
onConnectDialogClose | () => void | none | Called when the user closes the Connect dialog. |
On typing: the props interface isn't exported, and theme is loosely typed as Record<string, unknown>. To have the compiler check your theme, use the exported AutomationHubTheme type (the marketplace reads the same keys) with satisfies rather than a type annotation, as in Theming. MapObjectFieldsType is exported too.
The component renders an iframe at ${baseUrl}/integration-marketplace.html#/embedded/marketplace and talks to it with postMessage, using four message types:
| Message | Direction | Carries | When |
|---|---|---|---|
EMBED_READY | iframe to your page | nothing | The page has loaded and wants its parameters |
EMBED_INIT | your page to iframe | params: {environment, jwtToken, theme} | In answer to EMBED_READY, and again whenever those props change |
EMBED_OPEN_CONNECT_DIALOG | iframe to your page | integrationId (a string) | The user clicked Connect or Connected |
EMBED_INTEGRATIONS_CHANGED | your page to iframe | nothing | The Connect dialog closed; refetch the catalog |
The iframe has no credentials of its own. Until EMBED_INIT arrives it shows loading dots and doesn't request the catalog; afterwards it keeps the token and environment in memory and sends them as Authorization: Bearer <JWT> and X-Environment. Change jwtToken, environment or theme after the iframe is ready and the component sends a fresh EMBED_INIT without reloading the frame. If the token or environment changed, the page drops its cached data and refetches, so a refreshed token, or a different user signing in on the same tab, never shows the previous user's catalog.
Both sides check where messages come from. Your page accepts EMBED_READY only from your ByteChef host's origin, and EMBED_OPEN_CONNECT_DIALOG only from that origin and its own iframe's window, so no other frame can make it open a dialog. The iframe accepts EMBED_INIT only from its parent window and only from an allowed parent origin. It sends EMBED_OPEN_CONNECT_DIALOG only to the origin that initialized it, and accepts EMBED_INTEGRATIONS_CHANGED only from that same parent.
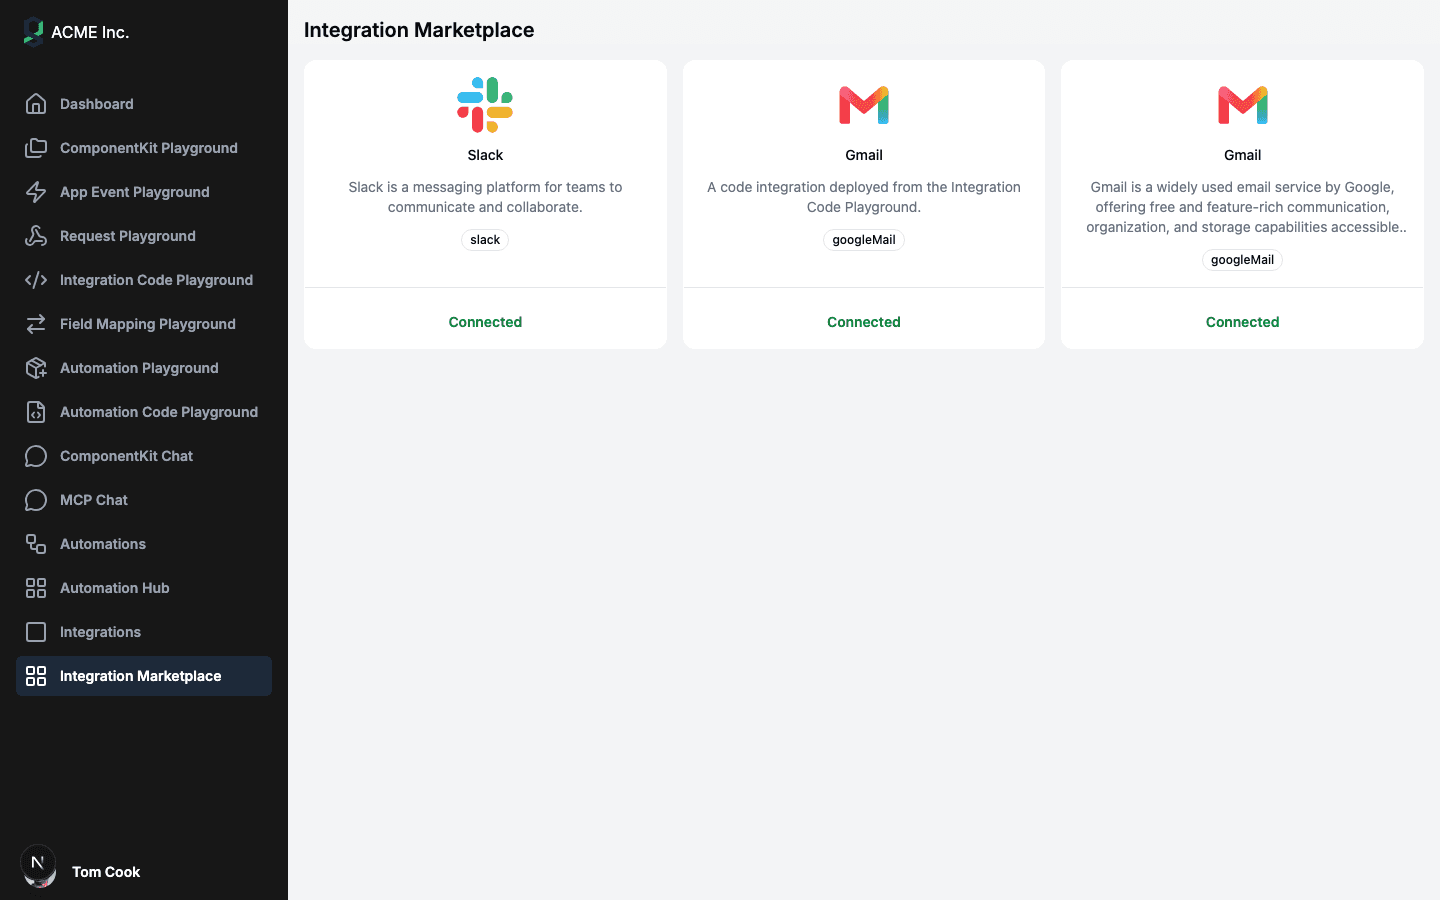
Users get a responsive grid of cards, one to four columns wide. Each card has the integration's icon; a title from the API's name field, which carries the component's display title (Gmail, Salesforce) and falls back to the component name; your description, or the component's own if you left it blank, clamped to three lines; a badge with the component name (gmail, salesforce); and a button reading Connected (in your theme's enable color) when the user already has an instance, Connect otherwise.
While loading, the page shows loading dots. A failed request shows an Unable to load integrations alert with the error, and an empty result says There are no integrations available yet., which is what you'll see if you skipped step 2.
Connect opens part one's ConnectDialog, running the OAuth2 or API key flow for that integration. For OAuth2, the provider's consent screen opens in a separate window from your page, exactly as with the hook.
Connected opens the dialog too. Since the marketplace doesn't name an instance, the dialog falls back to the user's first instance of that integration and opens in manage mode: switch workflows on and off, edit their inputs, or disconnect.
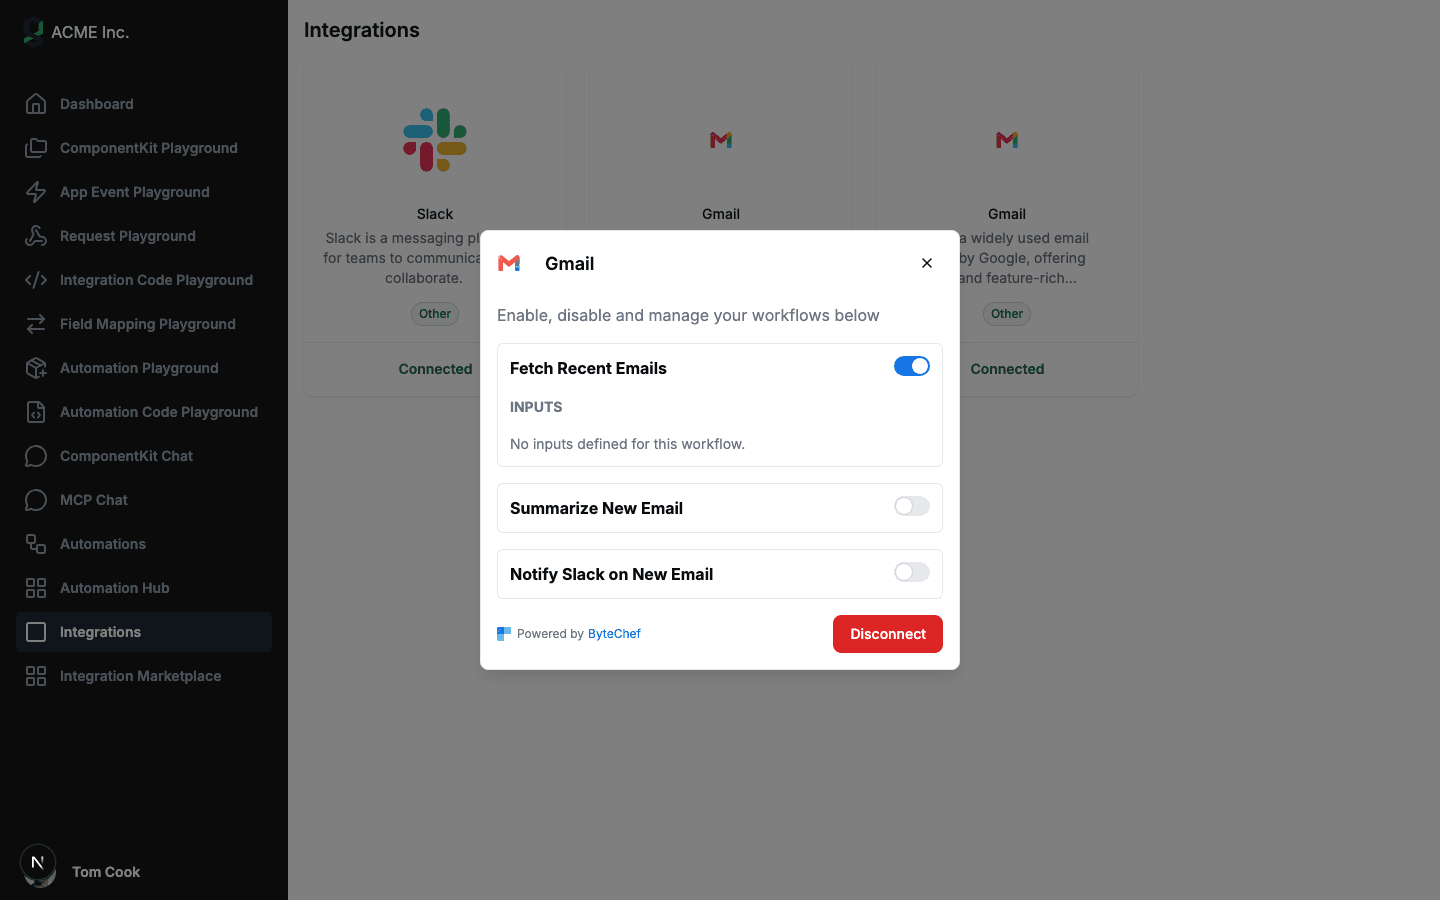
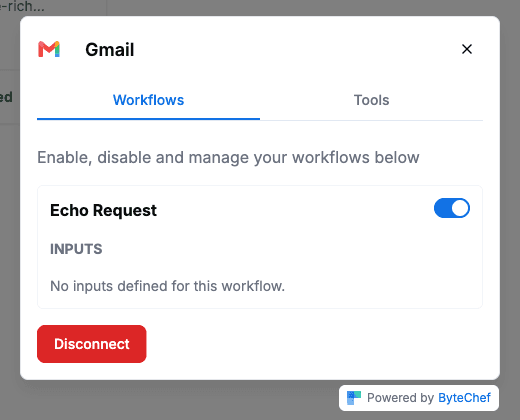
Manage mode saves each change as it's made, so there's no Save button to forget. A workflow switch sends POST (on) or DELETE (off) to /api/embedded/v1/integration-instances/{id}/workflows/{workflowUuid}/enable. Input edits are debounced for 600 ms, then saved with a PUT to /api/embedded/v1/integration-instances/{id}/workflows/{workflowUuid}.
The catalog lives in an iframe, but the Connect dialog doesn't. Here's the round trip when a user clicks Connect:
EMBED_OPEN_CONNECT_DIALOG with the integration's id, addressed only to the page that initialized it.useConnectDialog in your page for that integration, passing your baseUrl, jwtToken, environment, mapObjectFields and theme.mode, and opens it.EMBED_INTEGRATIONS_CHANGED back to the iframe, which refetches its catalog, and then calls your onConnectDialogClose.Step three is why. mapObjectFields is how a Connect dialog renders field mapping, a workflow input that asks the user to pair your application's fields with fields in their connected app. It's made of functions: callbacks that list the remote system's object types and fields live, against the user's own connection. The sample's, from the same page file:
mapObjectFields={{
    Contacts: {
        objectTypes: {
            get: async ({executeAction, search}) => {
                const objects = (await executeAction('salesforce', 1, 'listObjects', {search})) as Array<{
                    id: string;
                    name: string;
                }>;

                return objects.map((object) => ({label: object.name, value: object.id}));
            },
        },
        integrationFields: {
            get: async ({executeAction, objectType}) => {
                const fields = (await executeAction('salesforce', 1, 'listObjectFields', {objectType})) as Array<{
                    id: string;
                    label: string;
                }>;

                return fields.map((field) => ({label: field.label, value: field.id}));
            },
        },
        applicationFields: {
            fields: [
                {label: 'Title', value: 'title'},
                {label: 'Email', value: 'email'},
            ],
            defaultFields: [],
            userCanCreateFields: true,
            userCanRemoveMappings: true,
        },
    },
}}
postMessage carries strings, numbers, arrays and plain objects into an iframe, but throws on functions, so callbacks could never reach a dialog inside the catalog's iframe. In your page they stay where you defined them, next to your API client, your session and your feature flags.
Step four covers the other direction. Connecting and disconnecting happen in your page, which the iframe can't observe, so without the refresh message a card the user just disconnected would say Connected until a reload.
There's no private API here. The iframe and the dialog use the same embedded endpoints you'd call yourself, under /api/embedded/v1, authenticated with the connected user's JWT:
| Endpoint | Called by | What it does |
|---|---|---|
GET /integrations | The iframe | The user's catalog |
GET /integrations/{id} | The dialog, on open | One integration with its workflows, connection form and the user's instances |
POST /integrations/{id}/instances | The dialog, on Connect | Creates the user's instance from {connection: {parameters}} and returns its id |
POST, DELETE /integration-instances/{id}/workflows/{workflowUuid}/enable | The dialog, manage mode | Switches one workflow on or off for this user |
PUT /integration-instances/{id}/workflows/{workflowUuid} | The dialog, manage mode | Saves the workflow's inputs |
DELETE /integration-instances/{id} | The dialog, Disconnect | Removes the instance; answers 204 |
Every request carries Authorization: Bearer <JWT> and X-Environment. A missing or invalid token gets 401.
GET /api/embedded/v1/integrations
Authorization: Bearer <connected user's JWT>
X-Environment: DEVELOPMENT
[
{
"componentName": "gmail",
"description": "Gmail is the email service developed by Google...",
"icon": "<svg ...>...</svg>",
"id": 1052,
"integrationInstances": [
{
"connectionId": 1187,
"credentialStatus": "VALID",
"enabled": true,
"id": 1201,
"integrationInstanceConfigurationId": 1050,
"integrationVersion": 2,
"workflows": [{"enabled": true, "inputs": {}, "workflowUuid": "..."}]
}
],
"integrationVersion": 2,
"multipleInstances": false,
"name": "Gmail"
}
]ByteChef resolves the connected user from the token's subject and the environment from the header, then for each integration:
credentialStatus (VALID or INVALID) and the state of its workflows.An empty integrationInstances array means Connect; anything else means Connected, in the iframe and in part one's hand-built grid alike.
Connect posts the connection form's values to /integrations/{id}/instances. ByteChef reruns the selection to pick this user's self-serve configuration at that moment (the Assignment rule is checked here, once), creates the connection, and creates an instance on that configuration. Existing instances keep the configuration they were created on, so enabling a newer configuration later doesn't move anybody.
Disconnect sends DELETE /integration-instances/{id}. ByteChef refuses if the instance belongs to another connected user. Otherwise it switches off the instance's workflows, deletes the instance and its workflow settings, and then handles the connection: if nothing else uses it, it's deleted; if something still does (one of the user's automations, say), ByteChef keeps it as one of the user's own connections rather than break that automation.
Each endpoint also has a backend form with the user's ID in the path, authenticated with your environment's API secret key instead of a JWT: GET /{externalUserId}/integrations, POST /{externalUserId}/integrations/{id}/instances and so on. The marketplace never calls them; they're for your own admin views and server jobs.
The embedded sample app keeps both versions side by side on the same data. The sidebar has Integrations (/integrations, part one's hand-built grid) and Integration Marketplace (/integration-marketplace, this part).
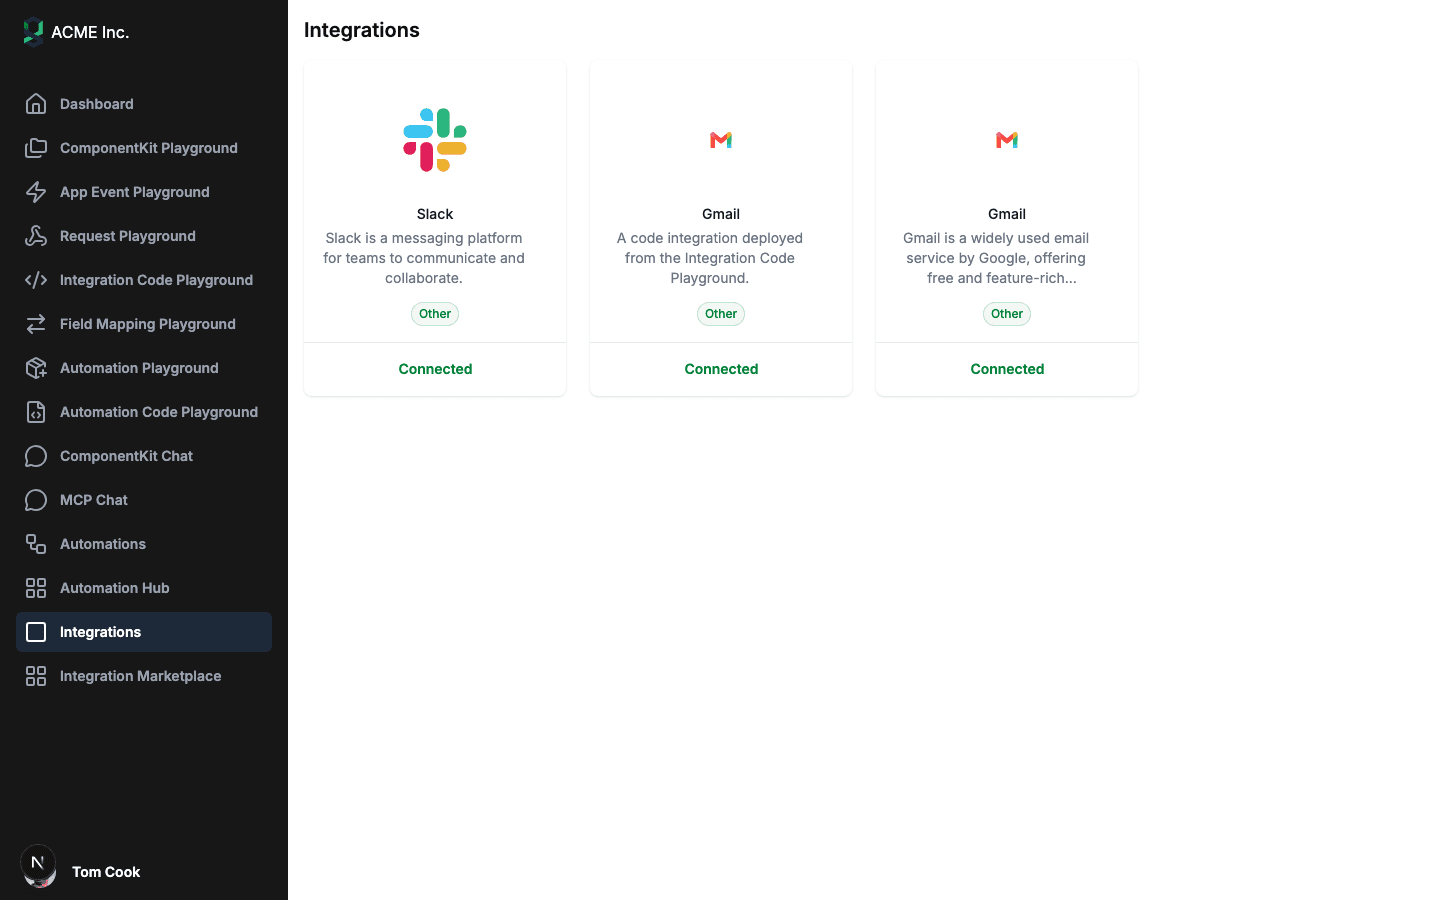
front-end/src/app/integrations/page.tsx | front-end/src/app/integration-marketplace/page.tsx | |
|---|---|---|
| Catalog | Its own fetch to /api/embedded/v1/integrations | Loaded inside the iframe |
| Cards, empty and error states | Its own JSX; a loading line, but no empty or error state | Built in, themed by theme |
| Card title | integration.name | name, falling back to componentName |
| Badge | integration.category ?? 'Other' | The component name |
| Connect / Connected | Its own check on integrationInstances.length | Built in |
| Opening the dialog | A ConnectDialogOpener that calls useConnectDialog | Mounted by the component, in your page |
| Refresh after close | A MutationObserver on #connect-dialog-portal | EMBED_INTEGRATIONS_CHANGED, then onConnectDialogClose |
| Field mapping | mapObjectFields on the hook | The same object on the component |
The hand-built page shows the cost of owning that contract. It used to read a title field the API doesn't return, so its cards had no headings until a recent fix switched it to name. Its badge still reads category, which the list response doesn't include, so every card says Other. With the marketplace, ByteChef maintains both sides.
Building your own still makes sense when the list has to sit inside an existing settings page, mix in your own data, or look like nothing ByteChef can theme. Use part one's API there, with the table above as your checklist. The marketplace is for when you'd rather not own the page at all.
The marketplace reads the same theme object as the Automation Hub. The keys that change the catalog:
| Key | Affects |
|---|---|
mode | 'light' or 'dark' for the catalog, and the Connect dialog |
surfaceColor | The page background behind the cards |
cardColor | The cards |
enableColor | The Connected label |
primaryColor | The brand color the page's components derive their accents from |
fontFamily | The page font |
borderRadius | Corner radius, as a px, rem, em or % length |
cssVariables | Any CSS custom property you want to set directly; keys must start with -- |
import {type AutomationHubTheme, IntegrationMarketplace} from '@bytechef/embedded';

const theme = {
    cardColor: '#ffffff',
    enableColor: '#15803d',
    fontFamily: 'Inter, sans-serif',
    mode: 'light',
    primaryColor: '#2563eb',
    surfaceColor: '#f4f4f5',
} satisfies AutomationHubTheme;

<IntegrationMarketplace jwtToken={jwtToken} theme={theme} />;
Why satisfies? AutomationHubTheme is an interface, and TypeScript won't assign an interface-typed value to the prop's Record<string, unknown>. satisfies checks every key and value against the interface while keeping the object's own type, which the prop accepts.
Colors must be hex values or anything CSS.supports('color', ...) accepts; invalid values are ignored rather than breaking the page. Only mode crosses into the Connect dialog: the dialog is part of the SDK and renders in your page, so its colors don't follow the rest of theme.
environment prop picks whose configurations count, and it defaults to PRODUCTION. The sample defaults to DEVELOPMENT; set it explicitly.EMBED_INIT it trusts. Compare your app's origin, scheme and port included, with BYTECHEF_EMBEDDED_ALLOWED_PARENT_ORIGINS. A blank frame with a frame-ancestors error in the console is the same mistake, caught one step earlier by the browser.onConnectDialogClose is a hint. It fires whether the user connected, disconnected or just dismissed the dialog, and in 0.4.0 it can fire more than once for a single close. Treat it as "something may have changed" and make your handler idempotent: a refetch rather than a counter.credentialStatus is INVALID. There's no reconnect button, so the user has to Disconnect and Connect again. If credentials often expire for an app, check credentialStatus from your backend and warn the user before a workflow fails.IntegrationMarketplace needs @bytechef/embedded 0.4.0 or later.BYTECHEF_EMBEDDED_ALLOWED_PARENT_ORIGINS to every origin that embeds the marketplace, and nothing else.environment="PRODUCTION" explicitly, along with the matching environment on every other embedded call your app makes.EMBED_INIT without a reload.metadata from your backend, sign in as users on each plan, and check each catalog. An expression error hides the integration.mode, primaryColor, surfaceColor and fontFamily, so the catalog and the dialog look like your product.On your side it's one component, a JWT and, if you map fields, the callbacks you'd have written anyway.
Those mapObjectFields callbacks got one code block here and deserve more. The next part, Field Mapping, covers how a workflow declares a field-mapping input, how the dialog turns your callbacks into an object-type picker and mapping rows, what executeAction really runs, and how the saved mapping reaches a running workflow.
Here's the whole series so far:
Parts one through ten gave you building blocks; eleven through thirteen give you whole pages. The workflow builder, the Automation Hub and the Integration Marketplace each run in an iframe on your ByteChef host with the same EMBED_READY / EMBED_INIT handshake, on the same JWT and embedded API as the blocks. Use the pages where they fit, and drop back to the blocks wherever a page has to be entirely yours.
Following along? Enable a configuration for one of your integrations, upgrade to @bytechef/embedded 0.4.0, run the embedded sample app, and open Integration Marketplace next to Integrations. Connect something in one and watch it show up as Connected in the other.
Get the latest guides on complex automation, AI agents, and visual workflow best practices delivered to your inbox.